Online Journalism

The GMU home for cross-platform journaism.

Online Journalism

Briggs Chapter 5

February 24th, 2011 · Comments Off on Briggs Chapter 5 · Comm361, Student Blog Posts

Going Mobile: Mobile reporting.

“According to an article in the Daily Telegraph, a London newspaper, children in the United Kingdom get their first mobile phones at age 8″ said Briggs.

Anyone one the ground can technically become a reporter at any given time that something newsworthy breaks out in front of them. A child could see a car accident, snap a picture of it, and the picture could end up on twitter, or even the front page of a newspaper the next day.

Briggs explained that there are two ends of the spectrum when using equipment on the field.

Gearhead: A dedicated mojo whose job is to be out and about and report from the field all day, ever day. This person is telling multimedia stories and publishing them from anywhere. Equipment needed- The best and coolest.

Light packer: A more traditional journalist, someone who occasionally needs to report or publish immediately from the field. Equipment needed- Just enough to get the job done.

You will need(compact versions are preferred): Laptop, Internet connection, camera, video camera, tripod, audio recorder, headphones, microphone, and/or cell phone.

Tags:

‘Journalism Next’ by Mark Briggs: Chapter 6 summary

February 24th, 2011 · Comments Off on ‘Journalism Next’ by Mark Briggs: Chapter 6 summary · Comm361, Student Blog Posts

Summary: Digital photography is crucial for journalists… Learn the basics.

Nikon D700 camera

Image via Wikipedia

Digital photography:

  • Digital cameras are much less limiting than film cameras
  • A megapixel represents one million pixels. The higher the megapixel the tighter you can crop in on an image and the bigger you can make the photograph without getting all those visible squares
  • The amount of images one can capture depends on how big the memory card is, and they can constantly be deleted and reused if need be.
  • Resolution is the number of pixels in an image. The higher the resolution the more space (in bytes) is taken up.
    • Computer monitors 72 pixels per inch (ppi)
    • Newspapers 200 ppi
    • Glossy photographs 300 ppi

Ownership, copyright and fair use:

  1. Do not “borrow” another persons work without premission
  2. Creative Commons Project: allows people to mark their work with Creative Commons license ranging from “all rights reserved” to “some rights reserved.” People can use others work as long as they receive credit.
Image representing Creative Commons as depicte...

Image via CrunchBase

Digital camera basics:

  • Point-and-shoot: Fixed lens and flash, has video mode
  • Single-lens reflex (SLR): Changeable lenses and flash for more or less power. May or may not have video mode, generally for a professional grade photographer only interested in still shots.

All cameras have:

  1. Modes; generally should be on automatic unless shooting video
  2. Zoom; to get a closer shot without moving closer
  3. View/delete; immediately view a photo and delete it if it’s not what you wanted to keep the extra photo space available for a better shot

***More time leads to better photographs***

Working with digital photographs:

  • Use a photo-editing software to edit photos and add special effects
  • Manage/organize photos on computer

- WHEN EDITING:

  1. Always edit copy NOT original
  2. Crop the photo
  3. Resize the photo so it is not too  big or small for the medium it’s being sent to
  4. Modify resolution
  5. Tone and color correct photo
  6. Save a web version: compress the image so it does not take as long to download
  7. Keep it simple: try not to over-edit the photo

Final step!

Publish photos online

Enhanced by Zemanta

Tags:

Briggs Ch. 6

February 24th, 2011 · Comments Off on Briggs Ch. 6 · briggs, Comm361, Student Blog Posts

The adage that a picture’s worth a thousand words has, alas, proven untrue whenever I try to submit a 1250-word paper to a professor with just a photograph and three paragraphs. But when it comes to online writing, not including pictures is a capital offense (and I’ll plead guilty to occasionally committing the crime).

A picture may not be literally worth a thousand words, but the difference between showing and telling is staggering. In print, perhaps a publisher might want to avoid the hefty amount of ink necessary to include a picture. That excuse doesn’t cut it online. Digital photography imposes little expense beyond the camera itself (which admittedly can be costly). However, that’s assuming you’re talking about photographs you’ve taken. Just like in print, any credible online publication will get permission from and credit any sources for its images.

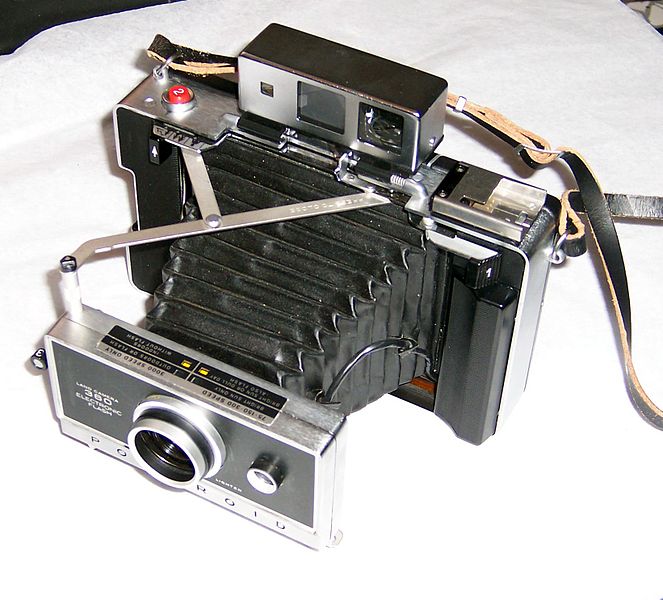
This is not a digital camera. But it's under Creative Commons so there you go.

There are many benefits to digital photography that don’t apply to conventional cameras as seen on the left:

  • A memory card holds a lot more pictures than a roll of film
  • You can immediately look at–and discard–any pictures you take
  • Pictures can be uploaded and shared with family, friends, editors, etc. easily
  • Editing and cropping images can be done quickly

All that said, digital photography is simply a progression of a technology that already existed. You use the pictures in the same way one would utilize conventional photographs.

Tags:

Briggs Chapter 6 Summary: Visual Storytelling with Photographs

February 24th, 2011 · Comments Off on Briggs Chapter 6 Summary: Visual Storytelling with Photographs · Comm361, Student Blog Posts


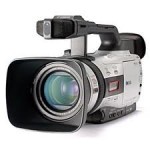
canongl2camcorder.org


“Journalism without photographs is like writing without verbs.”

Because photography used to take a great deal of training and expertise, “visual storytelling used to be reserved for serious technicians only.”

Digital photography + ubiquity of cell phone cameras, has made everyone a photographer

“Doing it well takes patience, practice and preparation.”

“You need to know the basics… composition, how to operate the camera, how to work with a subject so you can make them feel comfortable”

Digital cameras are convenient because you can:

  • Take as many pictures as you want
  • See immediately whether you captured the image you wanted
  • Upload pictures to the Web and share them
  • Save money: don’t have to purchase film and don’t pay to print photos you don’t want
  • Easily edit pictures on a computer

Pixel (PICTure ELement) — the visual representation of data in a digital image or graphic

Cameras store photographs as digital files on a memory card.  The more pixels in a photograph, the more bytes needed to store the picture.

Resolution — a measurement of pixels that are available to the human eye; refers to the number of pixels in an image

Photographs on Web sites need a resolution of only 72 ppi (pixels per inch); will look blurry in a newspaper, especially if enlarged

Ownership, copyright and fair use:

  • Do not “borrow” others’ photographs without permission
  • Creative Commons project:  an effort to legally protect those who wish to share their work as long as they are given credit

Digital camera basics:

  • Two kinds of digital cameras: beginners should use automatic settings

             1. Point-and-shoot, or all-in-one:  more compact, easier to use; more

                 affordable; lens + flash built in; most equipped with a video mode

             2. DSLR camera: captures better photos because image sensor 10x larger;

                 more complex to use; usually costs 2 to 3 times more; accessories

                 (lenses, flash) cost extra; video mode not as good    

  • Basic camera functions:

             1. Camera modes:  choose shutter speed icon from the dial on top

                 of the camera that represents the moment you’re trying to capture

             2. Zoom:  digital and optical; use only the optical provided by the

                  lens (doesn’t affect image quality)

             3. Flash:  lightning bolt icon on back of the camera; auto flash means

                  camera will determine whether flash will be used; you can turn off

                  the flash or “force” the flash (helpful when bright backlighting

                  leaves shadows on a subject’s face); avoid red eyes in photos

                  – use red-eye reduction mode, try changing angles or have

                  subject look slightly to the side of the lens

             4. View/delete: view photographs on your camera as you shoot

                  and delete ones you know won’t work

Shooting better photos with a digital camera:

  • Good composition cuts away unimportant, distracting elements
  • Best photos are shot with natural light only
  • Cloudy and partly sunny days are best for outdoor photography
  • Shooting mug shots/ head shots:

             1. Avoid harsh sunlight and strong backlight

             2. Try to photograph when skies are overcast

             3. Use flash as a last resort — adds shiny spots to faces

             4. Pick a background that’s neutral, simple and dark   

             5. Position the subject away from any walls

             6. Make sure nothing is “growing” out of the person’s

                  head (lamp, etc.)

             7. Biggest mistakes beginners make — they don’t get

                 close enough to their subjects or to the action, and they

                 don’t take enough photographs

             8. Shoot a variety of wide, medium and tight shots

                 makes editing easier + increases odds of having a good image

Working with digital photographs:

  • Real power of digital photography: editing on a computer
  • Altering photos by adding or removing objects is strictly forbidden in documentary journalism
  • Make sure photo reflects the scene accurately
  • View images from a storytelling point of view
  • Manage and organize photos from your camera to your computer by changing generic file names from digital camera to something you’ll recognize on your computer (combination of date and subject); use underscores, not spaces, to separate words in file names

Steps to prepare an image for online publishing:

  • Edit a copy of the photo — never the original
  • Crop the photo to omit unnecessary information
  • Resize the picture
  • Modify the resolution to 72 ppi
  • Tone and color correct the picture
  • Save a Web version
  • Keep it simple

How to build a good slide show:

  • Limit to two to three minutes in length
  • Use the right amount of photos
  • Match the photos to the audio
  • Use captions
  • Avoid awkward transitions — use fade in or out
  • Avoid overpowering music
  • Should have all the elements of a good story:

             1. Attention-grabbing opening

             2. Logical progression that builds to a climax

             3. A finish that provides a sense of summary

Briggs recommends Photoshop Elements to build a photo gallery and Soundslides to create slide shows with audio.


Don’t forget, “a picture is worth a thousand words.”  A photograph has impact.  It provides color and interest.  It makes the story come alive for the reader and later serves as a memory prompt for all of the emotions associated with it.


Tags:

Briggs Review 5: Mobile Journalism

February 24th, 2011 · Comments Off on Briggs Review 5: Mobile Journalism · Comm361, Student Blog Posts

Most cellphones have become a self-sufficient device that come in handy in many situations for journalists. With a cell phone you can shoot video, take pictures, write and publish/broadcast it all online without needing other equipment; this can also be referred as “backpack reporting.”Another perk to mobile journalism is that if you are on the scene of a breaking news event then you report on the event and put it online instantly. It also allows for liveblogging, which is instant blogging.

Here are a few examples of mobile journalism:

Tags:

Chapter seven: Making audio journalism visible

February 23rd, 2011 · Comments Off on Chapter seven: Making audio journalism visible · briggs, Comm361, Student Blog Posts

Painting sound pictures for listeners is a skill that takes much practice, according to Mark Briggs. Thank god, we have audio journalism to help us with that.

The good thing about audio journalism is that it can be done with a handful of tools — a microphone, recorder and free software. Long gone are the days of silent films. Now, through audio, journalists can capture the true essence of a story.

But what does audio actually bring to the table?

Presence: Now, you can bring your readers to the story, instead of the other way around.

Emotions: Tone, voice, expression and sound can be heard and moreover, felt.

Atmosphere: You can hear the environment and be a part of it.

Audio journalism expert and NPR’s very own Jonathan Kern has some tips for those who want to pursue this medium and how to write for it:

1. Write for the ear:  Write as you speak. Don’t go around using technical words like operose that many have no idea what the heck it means.

2. Use one idea per sentence: When people don’t have a visual aid to go along with a story, they lose a lot of what they hear. So stick to keeping it simple.

3. Repeat complex ideas: If there is something you want to stick to readers, repeat it. If there is something you want to stick to readers, repeat it. If there is something you want to stick to readers, repeat it.

4. Structure your words: Let people feel the tension of the rising action, climax and conclusion!

5. Perform: Keep the listener’s attention and interest any way possible!

Recording audio can be used for many different purposes such as:

So, get out your digital recorder. I f you don’t have one, buy one here and start recording!

Happy reading recording!

Tags:·

Chapter 6: Visual Storytelling with Photographs

February 22nd, 2011 · Comments Off on Chapter 6: Visual Storytelling with Photographs · Comm361, Student Blog Posts

“Show, don’t tell.”

Journalists are told of this phrase many, many times. Rather than describing the scene of news happening, it is better to find ways to take the audience to the scene. Photographs has been the most effective way to connect the audience with what the writer actually saw, and has evolved the most with the emergence of digital media. Nowadays, anyone can publish photos with just a few clicks — making the photojournalism more readily available to anyone.

However, equipments do not immediately make an amateur photographer a professional photojournalist. There are basics of how to operate the camera and how to work with the subject for the best outcomes.

Digital Photography

Tips for starters:

  1. Take as many pictures as you want
  2. Immediately see if the picture you just captured is what you wanted
  3. Upload the pictures and show to friends and family
  4. Edit the pictures — crop them, enhance them, toning them, etc.

– Pixel: Abbreviated form of “picture element”, pixel is the visual representation of data in a digital image or graphic

There are standard resolutions used in each medium. On computer screens, pictures are shown in 72ppi (pixels per inch), therefore the photos should be compressed to 72ppi to be uploaded on Web. Thus, printed newspaper uses 200ppi and glossy magazine uses 300ppi.

Ownership, Copyright and Fair Use

Photographs are easy to be shared digitally. They also can easily be infringed of copyrights. Basically, don’t steal. Images found on search engines such as Google or Yahoo may be protected by the fair use clause of the U.S. Copyright Law, but users must be aware that the search results are not limited in the U.S. Use Creative Commons to search images that are legally approved for the fair use.

Two Kinds of Digital Cameras

  • Point-and-shoot: Compact cameras that are easy to use and more affordable. Most of them are equipped with lens and flash
  • Digital SLR (DSLR): Professional-level cameras that are equipped with larger image sensors — up to 10 times larger than point-and-shoot cameras. Most of them can have lens and flash replaced. They are more expensive and more complex to use.

How to Use Digital Camera

  • Camera modes: Usually the camera is equipped with a dial to select camera modes such as the following: portrait, sports, landscape, low-light or automatic mode.
  • Zoom: Point-and-shoot cameras offer optical zoom and digital zoom and DSLR cameras use optical zoom. Digital zoom affects the image quality while the optical zoom does not.
  • Flash: There are usually automatic, red-eye reduction and manual modes. Flash can also be adjusted for the angle of the light.
  • View/delete: This function lets the photographer browse through the pictures that were captured and decide which to keep and which to not.

Lighting is the most important aspect in photography. There are three ways to provide lighting:

  1. With natural (or ambient) light only — guarantees the best image quality, especially in cloudy and partly sunny days.
  2. With flash only.
  3. In mix of natural light and flash.
    More CHIMP'in

    Image by Illusive Photography via Flickr

To take better photos, practice the following:

  • Hold the camera steady
  • Fill the frame — try to fit the head of the subject to the top of the frame
  • Focus on one thing — focus on the subject’s eyes to produce the sharpest portrait picture
  • Get closer — don’t be afraid to move all around the space to catch the best angle for the photograph
  • Go vertical — when the subject is vertically oriented, flip the frame to fit the subject
  • Shoot action — capture the action at the shutter speed of 1/500th second.

Mug Shots

Avoid flash and strong sunlight. Use the flash as the last resort. Pick the right, neutral background. Position the subject away from the walls. Make sure there is no pole-like subject “growing” out of the person’s head.

Working with Digital Photographs

Store them well. Always remember to backup your pictures to prevent loss in case of computer failure, bad memory card, etc.

Manage them well. Categorize your photos and store them in separate folders. It will make the photos quickly accessible when you need them, without browsing through hundreds of pictures.

Edit them well. There are tons of options out there: iPhoto, Windows Photo Gallery, Piknik, Snipshot, Picasa, Flicker and Photoshop.

There are a few simple steps to follow when publishing your photos:

  1. Never post original photos. Edit them for the better.
  2. Crop the photo to omit unnecessary parameters.
  3. Resize to fit your needs
  4. Compress the resolution to fit your needs
  5. Tone and color-correct
  6. Save a Web version — compress your photos to 72ppi and save them as separate files. Posting pictures in higher resolution will result in slow loading time of your Web page.
  7. Keep it simple — if all you need to do about your photo is to crop, use simpler applications such as Piknik. This will save time in editing.

Publish Your Photos Online

  1. Wrap text around photo
  2. Use intuitive alternate text. It will optimize your post for search engines, as well.
  3. Remember that it is only a link to a photo — storing images in image-hosting websites will make the process more efficient
  4. Use a screenshot and a link

Even with all the technological knowledge, however, creativity and fearlessness makes one a great photographer. And it takes a lot of practice.


Enhanced by Zemanta

Tags:

Skype session with Burt Herman

February 22nd, 2011 · Comments Off on Skype session with Burt Herman · Comm361, Storify, Student Blog Posts

CEO of Storify

This is Burt. This is the website he co-founded.

Courtesy of bertherman.com: He is an “Entrepreneurial journalist stoking media revolution. CEO and co-founder of Storify, building the future of journalism. Founder of Hacks/Hackers, bringing together journalists and technologists.”

Great introducation on Burt- now for the BIG news! He skyped with us today from somewhere on the west coast. My guess is Silicon Valley since he is a technology superstar.

He talked about how storify can be a tool to simplify the process of telling a story online. “We have this amazing situation where everyone can be a reporter on the ground” Burt said.

Storify knows that a tweet, is a tweet. A video has certain tags on it. This information is much richer than it would be if you simply just copied and pasted in links.

Professor Steve Klein asked, “How do you stay plugged in? Telling stories is constantly changing becasue of all of these newer online platforms.”

Burt Herman responded with, “I’m hungry to always search new sites out. I get emails everyday from places like mediabistro, mashable; I have tech friends. I do look at twitter, but i do confess, it’s not always a news good source for me. Sharing your idea is the best  thing to do. Nobody is going to steal your idea, because they wont care about it as much as you do.” Mark Zuckerberg would.

Tags:·······

Visual Storytelling-Chapter 6 Mark Briggs

February 22nd, 2011 · Comments Off on Visual Storytelling-Chapter 6 Mark Briggs · Comm361, Student Blog Posts

If you were to choose between reading a two page essay or flipping through a picture book on the same topic, which one would you choose? Our minds usually just wander to the picture book answer because pictures are visually more engaging. They tell a story within themselves and are a must-have for every article you write.

Libyan protesters, photo taken from CNN article.

  • Digital photography is the one of the biggest features to an online journalists story. The convenience of a digital camera is one of the reasons why people are rapidly switching from traditional cameras to digital. You can see your picture immediately after you take it, you picture taking is not limited by the amount of film remaining, and you can upload the pictures anytime, anywhere. You can also edit the photos no matter where you are as long as you have your laptop.

*Always remember, when you take pictures from other sources, you need to CITE THEM. Otherwise you could be sued and that opens up a whole lot of legal troubles that I have no idea how to explain. Just cite your sources.

  • There are two types of digital cameras:
  1. A point-and-shoot, is more compact, easier to use and less expensive than other types. They usually come with a built in flash, video mode and lens, making it easily packable for a reporter on the move.
  2. A DSLR camera, this will capture better quality photos because the image sensor is 10x larger than the other type of camera, but it will cost you two or three times more. It is more complex and the accessories (like lens and flash) are an additional cost.

  • Tips for taking better photos:

Hold the camera steady: If you must, support yourself on something steady while taking the picture

Fill the Frame: Be careful not to leave to much headroom

Focus on one thing: A good point of focus is the subject eyes

Get closer: Get the right angle and move around

Go vertical: Follow the subject, if the subject is vertical, go vertical

Shoot action: Capture in the moment photographs, avoid poses

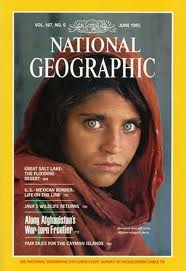
The famous National Geographic photo of a young Afghan girl on the June 1985 cover.

  • Editing and uploading a photo has become easy with sites like Twitter, Facebook, and Flickr. Briggs gives you these simple suggestions when your editing your photos:
  1. Edit a copy of a photo-never the original
  2. Crop the photo
  3. Resize the picture
  4. Modify the resolution
  5. Tone and color correct the picture
  6. Save a web version
  7. Keep the photo editing simple

*Check out 2011′s best photo editing software here.

Tags:

‘Journalism Next’ by Mark Briggs: Chapter 5 summary

February 22nd, 2011 · Comments Off on ‘Journalism Next’ by Mark Briggs: Chapter 5 summary · Comm361, Student Blog Posts

Summary: “Going mobile” What to look for when out in the field needing to get the information out to the audience immediately.

-Breaking news, live, from a mobile device

Laptops –> smartphones –> audio recorders –> video cameras

How To Choose the story:

  • Will the audience benefit if we take them there?
  • Will journalism be better if it’s done on location and with urgency?
  • Can this event be effectively communicated in small chunks over time?
  • Will sound reporting or video footage, turned around quickly, help peple understand the story?

Tim Repsher: managing director; mobile development, Media General

First to know, first to tell: Look for the part of the story that is immediate, the content that benefits from being told right now.

Mobile is a news collector: Journalists can’t be in all places at once, so give your audience a voice.

News is in the eye of the beholder: Know what is immediate to your readers… Use mobile to give people the news when and where they want it.

Gear:

  • Gearhead: The journalist; “be out and about and reporting in the field all day everyday.” Wants all the latest equipment:
    • Laptop
    • Internet
    • Camera
    • Video camera
    • Tripod
    • Audio recorder
    • Headphones
    • Microphone
    • Cell phone
      LAS VEGAS - JANUARY 08:  A new Palm Pre smartp...

      Image by Getty Images via @daylife

  • Light packer: Traditional journalist; occasionally needs to report immediately
    • Smartphone with:
      • Camera with video mode and flash
      • Full QWERTY keyboard
      • Internet capability with full featured e-mail

Publishing options:

  1. Mobile microblogging
  2. Live blogging
  3. Mobile video
  4. Mobile multimedia
  5. Mobile crowdsourcing
Enhanced by Zemanta

Tags: